2. ROS 2 basics
Core ROS 2 concepts - nodes, topics, services, DDS discovery
Basic Concepts
Estimated time to completion: 1.5 hours
Simulated robot: Turtlebot 3 Burger
What will you learn with this unit?
- What is ROS 2?
- How to structure and launch ROS 2 programs (packages and launch files)
- How to create basic ROS 2 programs (Python based)
- Basic ROS 2 concepts: Nodes, Parameters, Environment Variables, DDS Discovery
- Debugging Tools: ROS 2 Command Line Interface (CLI)
What is ROS 2?
ROS 2 (Robot Operating System 2) is a set of software libraries and tools that help you build robot applications. It provides drivers, state-of-the-art algorithms, and powerful developer tools for your next robotics project. It's all open source.
Unlike ROS 1, ROS 2 has no central master — nodes discover each other automatically over DDS (Data Distribution Service), a battle-tested publish-subscribe middleware used in aerospace and defense.
Let's start with learning about ROS 2!
- First we need to start the simulation of our mobile robot in a world depicted in the img below.
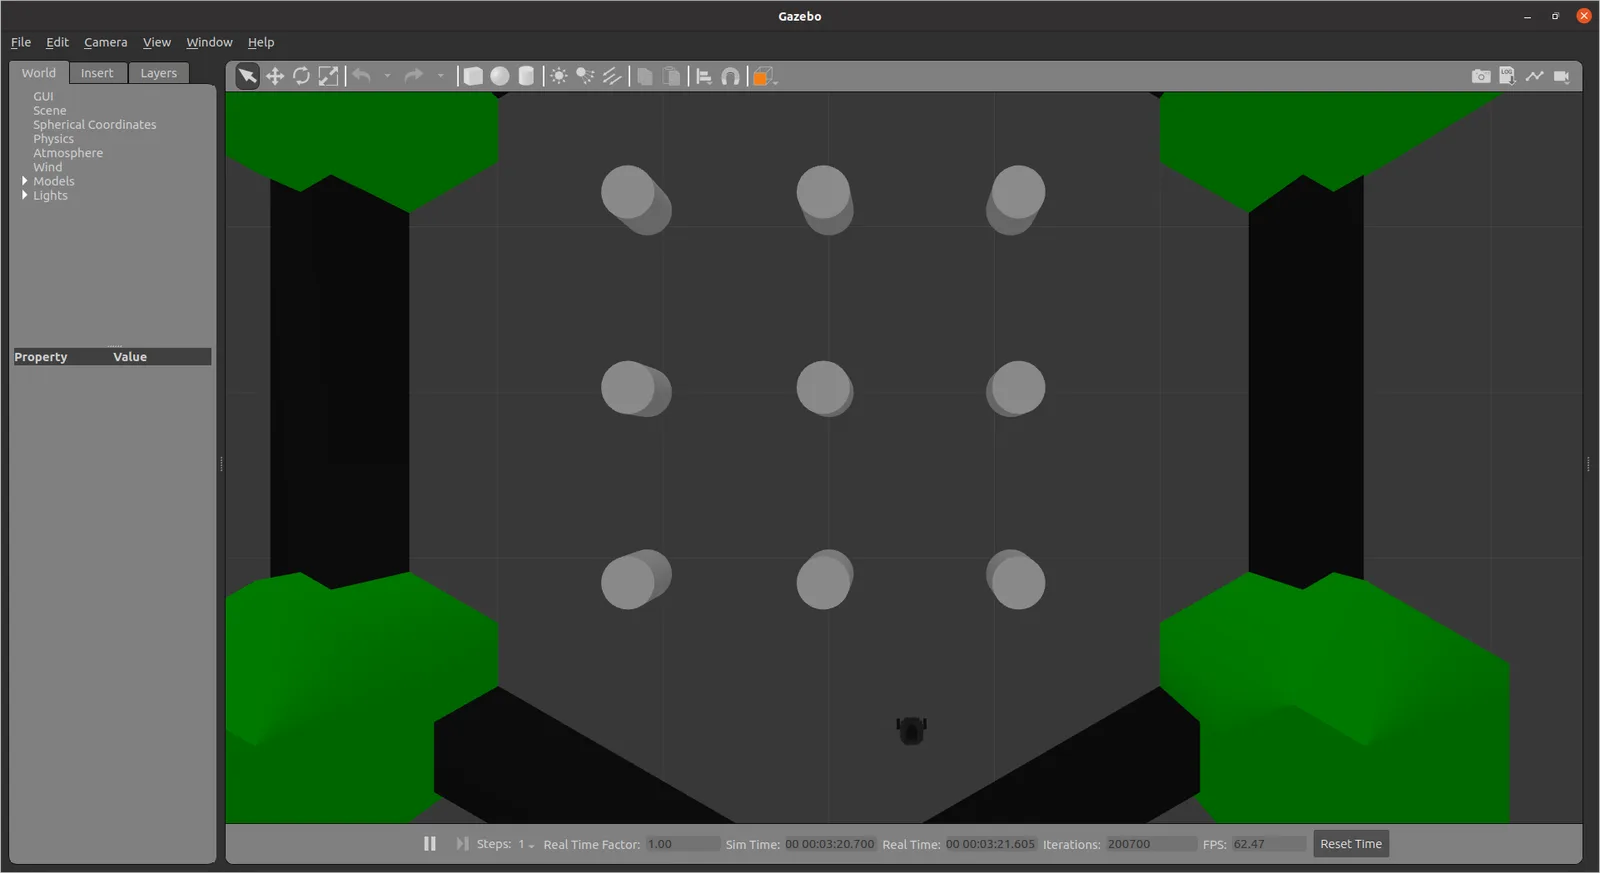
For this we use an existing simulation provided by ROBOTIS. Execute the following commands in different terminals.
Set the TurtleBot3 model once per shell (or add it to ~/.bashrc):
export TURTLEBOT3_MODEL=burgerStart the simulation, in gazebo, and put the robot inside:
ros2 launch turtlebot3_gazebo turtlebot3_world.launch.pyOpen another vertikal terminal window in tmux by pressing [ctrl] + [b] and then [Shift + 5]. You now should have two terminal windows side by side.
In ROS 2 the coordinate frame publisher (robot_state_publisher) is already started by the turtlebot3_world.launch.py launch file, so you do not need a separate bringup launch here. Just move on to the next step.
Hooray so easy is the start of a simulated robot with ROS 2 and GAZEBO.
Let's continue by moving our robot. For this execute one of the following commands in a new terminal
Open another horizontal terminal window in tmux by pressing [ctrl] + [b] and then [Shift + 2]. You now should have two terminal windows side by side.
Move the robot:
Paste the following command in the new terminal:
ros2 run turtlebot3_teleop teleop_keyboardNow you can move the robot using the keyboard with the [w,a,s,d,x,s] keys (teleop_keyboard command). But make
sure that the terminal window is active, otherwise the robot won't move!
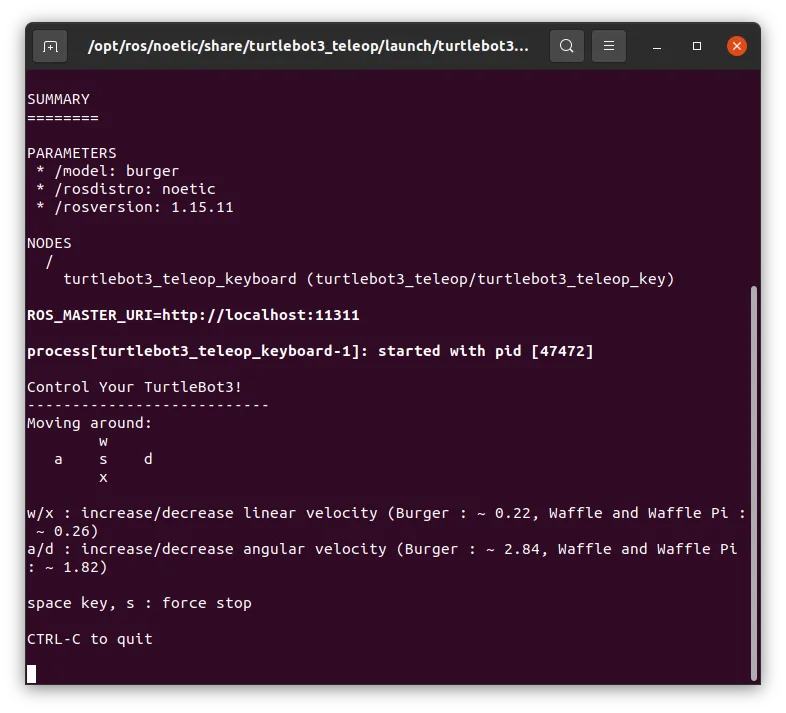
To exit the teleop_keyboard press [ctrl] + [c] at the same time in the terminal where the command was executed.
You can also move the robot using the GUI (rqt_robot_steering) by executing the following command in a new terminal:
ros2 run rqt_robot_steering rqt_robot_steering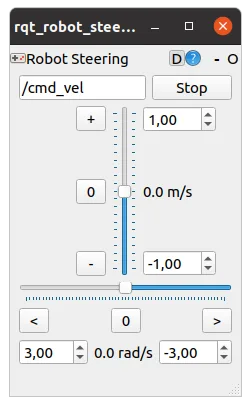
Try it now!!!
-
To stop any running (linux) commands press
[ctrl] + [c]at the same time in the desired terminal. -
To close any window press
[ctrl] + [d]at the same time in the desired terminal.
Explanation
Here we used two subcommands of the ROS 2 CLI to start a number of executables (aka. nodes) (ros2 launch) or just one node (ros2 run). The basic syntax for the commands is as follows:
ros2 launch [package_name] [launchfile_name]ros2 run [package_name] [executable_name]What is a ROS 2 package?
ROS 2 uses ament packages to organize all its programs. You can think of a package (pkg) as all the files that a particular ROS 2 program contains to perform its task (all cpp files, python files, configuration files, build files, launch files, and parameter files). All pkgs should follow this folder organization:
CMakeLists.txt(orsetup.pyfor Python): Build rules, also handles installationpackage.xml: Package information and dependencies (now usesament_cmakeorament_pythonas build type)launch/: Folder that contains launch files (Python.launch.py, XML, or YAML)src/: Folder that contains source code (c++, python)
To see where a package lives on disk use ros2 pkg prefix, and to change into the share folder of a package:
cd $(ros2 pkg prefix --share [package_name])Exercise [5 min]
Try to change the path to the previously used pkgs (turtlebot3_gazebo, turtlebot3_teleop, rqt_robot_steering) and list the contents (Hint: use ls to check the content). Can you find something strange?
Exercise Solution
What is a launch file?
So far we only know that launch files can be used to start an arbitrary number of executables (nodes). Let's have a look at how this is done.
In ROS 2 launch files are Python programs (they can also be XML or YAML, but Python is the default). Let's inspect the launch file we used earlier:
cd $(ros2 pkg prefix --share turtlebot3_gazebo)/launchcat turtlebot3_world.launch.pyYou should see a Python file that starts with something like the following:
from launch import LaunchDescription
from launch.actions import IncludeLaunchDescription, DeclareLaunchArgument
from launch.launch_description_sources import PythonLaunchDescriptionSource
from launch_ros.actions import Node
from ament_index_python.packages import get_package_share_directory


def generate_launch_description():
    return LaunchDescription([
        # declare arguments, include other launch files, launch nodes …
        Node(
            package='turtlebot3_teleop',
            executable='teleop_keyboard',
            name='turtlebot3_teleop_keyboard',
            output='screen',
        ),
    ])
A ROS 2 launch file is just a Python function generate_launch_description() that returns a LaunchDescription object. Inside it you declare:
package='package_name': Name of the package that contains the code of the ROS 2 program to executeexecutable='executable_name': Name of the program registered with the package (fromsetup.pyconsole_scriptsfor Python, orinstall(TARGETS ...)inCMakeLists.txtfor C++)name='node_name': Name of the ROS 2 node that will launch our executable fileoutput='type_of_output': Through which channel you will print the output of the executable file ('screen'is the typical choice during development)
Create a ROS 2 package
Until now we have checked the structure of already existing packages.... but now we want to create our first pkg together.
When we want to create packages, we need to work in a very specific ROS 2 workspace known as a colcon workspace. The colcon workspace is the directory on your hard drive where your ROS 2 pkgs (other source code based pkgs / not installed via apt) must reside in order to be used by ROS 2. Normally, the colcon workspace directory is called ros2_ws and is located in /home/[user_name]/ros2_ws.
If your ros2_ws is not setup follow this tutorial and continue afterwards.
Let's discuss the syntax for pkg creation now:
ros2 pkg create --build-type ament_python --dependencies [dependencies] [package_name]The package_name is the name of the package you want to create, and the dependencies are the names of other ROS 2 packages that your package depends on. The --build-type can be ament_python for pure Python packages or ament_cmake for C++ (and mixed) packages.
Change the directory to the source folder inside the ros2_ws:
cd ~/ros2_ws/srcCreate a new ROS 2 pkg (Python):
ros2 pkg create --build-type ament_python --dependencies rclpy std_msgs sensor_msgs first_pkgWe also set dependencies to rclpy, std_msgs, and sensor_msgs. These are the most common dependencies for ROS 2 Python pkgs. rclpy is the Python client library for ROS 2, std_msgs contains common message types, and sensor_msgs contains message types for sensors. (For C++ you would use rclcpp instead of rclpy and --build-type ament_cmake.)
Build the workspace so the new package is known to ROS 2:
cd ~/ros2_ws && colcon build --symlink-installsource install/setup.bash: We source the install/setup.bash file to load pkgs inside the ros2_ws.
source install/setup.bashCheck if the pkg has been created successfully by utilizing the ROS 2 CLI.
ros2 pkg list: Gives you a list with all the packages in your ROS 2 system.ros2 pkg list | grep my_package: Filters, from all the packages located in the ROS 2 system, the package namedmy_package.
ros2 pkg list | grep first_pkgfirst_pkgros2 pkg prefix first_pkg: Prints the install prefix of the package on disk.
ros2 pkg prefix first_pkgYou can also see the package created and its contents by just opening it with the file explorer/ IDE of choice under ~/ros2_ws/src/first_pkg.
First ROS 2 executable
Executables in ROS 2 are called nodes, more on nodes later.
We just created our first ROS 2 package, now let's put some code into it.
Create a launch folder inside our pkg (the Python source folder named first_pkg already exists — that's where our Python node files go):
cd ~/ros2_ws/src/first_pkg && mkdir -p launchCreate a Python file for our first node:
touch first_pkg/first_node.pyCreate a launch file:
touch launch/first_pkg_launch.pyOpen the first_pkg/first_node.py file with vim or VSCode:
Using Vim:
vim first_pkg/first_node.pyNow press i to enter insert mode and paste the code below. To save and exit press esc and type :wq for write and quit and press enter.
Using VSCode:
In VSCode you can simply click on the file and paste the code in the editor.
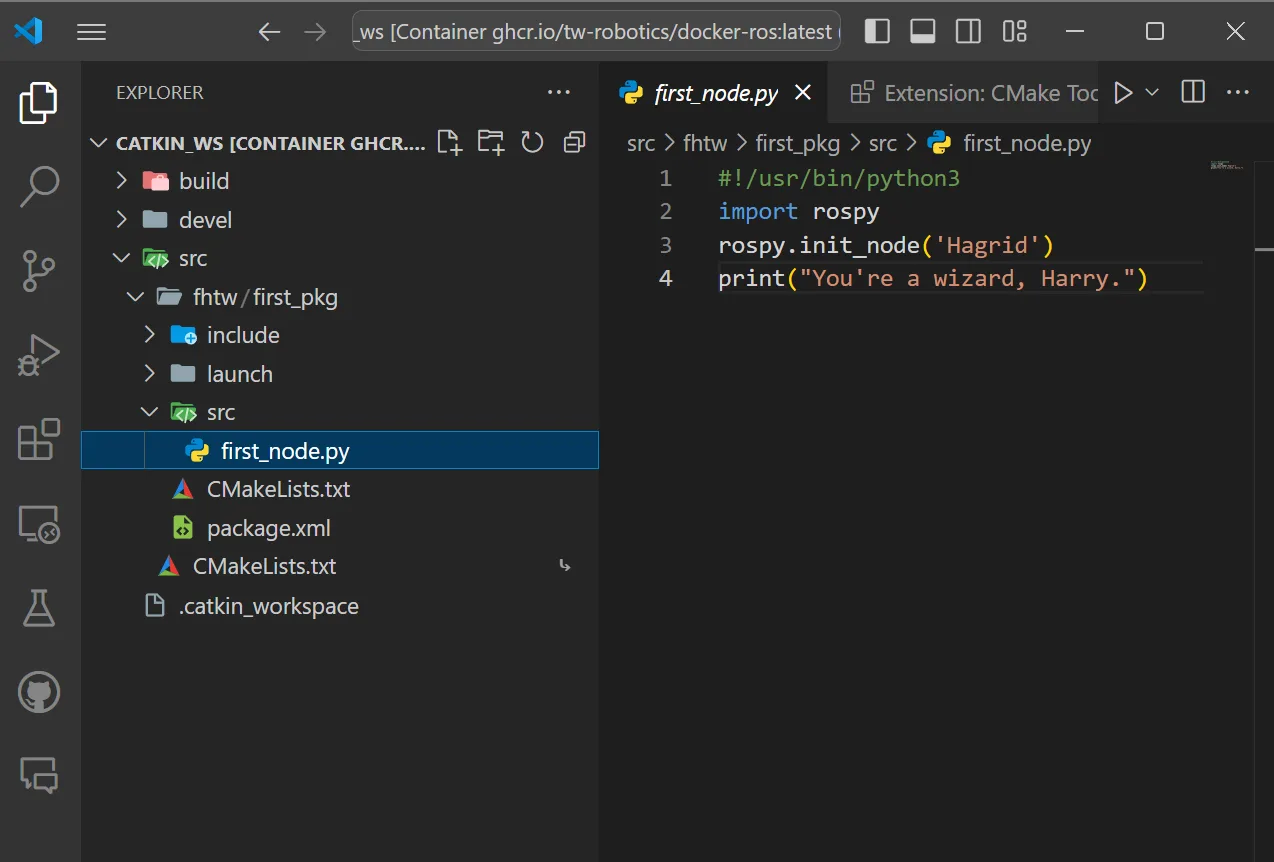
Put the following code in the first_node.py file:
import rclpy
from rclpy.node import Node


class Hagrid(Node):
    def __init__(self):
        super().__init__('Hagrid')
        self.get_logger().info("You're a wizard, Harry.")


def main(args=None):
    rclpy.init(args=args)
    node = Hagrid()
    rclpy.shutdown()


if __name__ == '__main__':
    main()
Now register the node as a console script in setup.py (inside ~/ros2_ws/src/first_pkg/setup.py). Find the entry_points section and add the first_node line:
entry_points={
    'console_scripts': [
        'first_node = first_pkg.first_node:main',
    ],
},Exercise [5 min]
Try to copy and adapt a launch file that starts our first_node script. Then build the workspace and start the launch file.
Exercise Solution
ROS 2 Nodes
You have created a node previously in this tutorial, but what exactly is a node?
A ROS 2 node is basically a process that performs computation. It is an executable program running inside your application. You will write many nodes and put them into packages.
Now let the launched node open and open a new terminal by pressing [ctrl + b] and [Shift + 5] to check if the node is running.
To see a list of running nodes execute the following command in the new terminal:
ros2 node list I know you can't find it, that's simply because the node ended immediately after printing our Harry Potter quote — nothing kept the executor alive.
Here is how we fix that: we spin the node so the executor keeps it running.
Navigate to the first_pkg source directory and open the first_node.py file:
cd ~/ros2_ws/src/first_pkg && vim first_pkg/first_node.pyVim trick to delete all lines in a file:
- Press
ggto go to the first line of the file. - Press
dto enter delete mode: - Press [
shift + G] to delete all lines.
Press esc and type :set paste to paste the code below:
Make sure the indentation is correct, as Python is very sensitive to indentation. If necessary, correct the inserted code.
import rclpy
from rclpy.node import Node


class Hagrid(Node):
    def __init__(self):
        super().__init__('Hagrid')
        # Create a timer that prints every 100 ms (10 Hz)
        self.timer = self.create_timer(0.1, self.on_tick)

    def on_tick(self):
        self.get_logger().info("You're a wizard, Harry")


def main(args=None):
    rclpy.init(args=args)
    node = Hagrid()
    try:
        rclpy.spin(node)    # Endless loop until Ctrl + C
    except KeyboardInterrupt:
        pass
    finally:
        node.destroy_node()
        rclpy.shutdown()
    # This program creates an endless loop that repeats itself 10 times per
    # second (10 Hz) until somebody presses Ctrl + C in the Shell or kills
    # the node using the ROS 2 CLI (ros2 node kill /Hagrid is not a thing —
    # you simply Ctrl+C the process).


if __name__ == '__main__':
    main()
Save and exit the file by pressing esc and typing :wq and pressing enter.
Rebuild and start the launch file again to see the change:
cd ~/ros2_ws && colcon build --symlink-install && source install/setup.bashros2 launch first_pkg first_pkg_launch.pyCheck if you can find the node by typing in a new other terminal, created with [ctrl + b] and [Shift + 5]:
ros2 node list 
Build a ROS 2 package with colcon
When you create a package, you will usually need to build it (especially C++ code / custom msgs / custom actions) in order to create the executable. In ROS 2 there is one official build tool: colcon. It replaces catkin_make and catkin build from ROS 1.
Neither Python files nor launch files need to be recompiled after changing the code if you built with --symlink-install — colcon symlinks your sources into the install space. For C++ code you always need to rebuild.
Navigate to the workspace directory:
cd ~/ros2_wsBuild the whole workspace:
colcon build --symlink-installOr build just one package (faster):
colcon build --packages-select first_pkg --symlink-installBoth commands build your whole src directory of the ros2_ws (or the selected subset), and both need to be run in your ros2_ws directory in order to work. This is MANDATORY. If you try to build from another directory, it won't work.
If something behaves strangely after a rename or a big refactor, delete build/, install/, and log/ and rebuild from scratch.
To remove the build artifacts execute the following commands:
- Navigate to the
ros2_wsdirectory:
cd ~/ros2_ws- Remove the build/install/log folders:
rm -rf build install logrmis for remove-ris for recursive (which means it will remove all files and directories inside)-fis for force (which means it will not ask you for confirmation)
Now you can build cleanly again:
colcon build --symlink-installROS 2 Parameters
In ROS 2 parameters are not stored on a central parameter server. Instead, every node owns its own parameters. They are typed (int, double, string, arrays), can be declared with descriptors (read-only, range-checked), and are loaded from YAML files at launch time.
First start any ROS 2 node (so we have something to attach parameters to). For quick experiments, use the demo node:
ros2 run demo_nodes_cpp parameter_blackboardOpen a new terminal window with [ctrl + b]and [Shift + 5].
To get a list of all parameters for the running nodes:
ros2 param listTo get the value of a parameter execute:
ros2 param get [node_name] [param_name]To set the value of a parameter execute:
ros2 param set [node_name] [param_name] [value]Exercise [5 min]
Now try to create a new parameter called Hermonie on the parameter_blackboard node that contains the following value and check the value:
"Now, if you two don't mind, I'm going to bed before either of you come up with another clever idea to get us killed or worse… expelled!"Tip
If ros2 param set fails with Setting parameter failed: parameter not declared, make sure the target node allows undeclared parameters. parameter_blackboard does; your own nodes need automatically_declare_parameters_from_overrides=True or an explicit declare_parameter() call.
Exercise Solution
DDS discovery (the ROS 2 replacement for roscore)
In ROS 1 every node had to register with a central roscore / rosmaster. ROS 2 has no master. Nodes discover each other automatically through DDS (Data Distribution Service), a battle-tested publish-subscribe middleware used in aerospace and defense.

Notice there is no ROSCORE box. The dashed boundary is the DDS multicast domain — every node on the same ROS_DOMAIN_ID automatically sees every other node. Once two nodes have found each other, message data flows peer-to-peer, never through a broker.
ROS_DOMAIN_ID
DDS uses multicast to discover peers. If you have two robots (or two developers) on the same LAN you'll get cross-talk by default. Isolate them by setting different domain IDs:
export ROS_DOMAIN_ID=42Anything from 0 to 101 is safe; pick a number per project. Any node started after the export will only see other nodes with the same ROS_DOMAIN_ID.
Quality of Service (QoS) profiles
Topics in ROS 2 add QoS profiles on top of pub/sub so you can ask for reliable or best-effort delivery, keep-last or keep-all history, transient-local (late-joiners get the last message), and so on. This is what makes ROS 2 suitable for real-time and unreliable networks.
| Preset | Use case |
|---|---|
| Default (reliable, depth 10) | Commands, state updates |
SensorDataQoS() | Best-effort, depth 5 — for high-rate sensors that can drop frames |
transient_local() + reliable | Maps, static configuration — late subscribers still get the latest message |
If a publisher and subscriber have incompatible QoS profiles, the connection simply doesn't form. Use ros2 topic info /name -v to spot incompatibilities.
Homework [5 Points]
- Create a launch file named
simulation.launch.pyin the launch directory of ourfirst_pkg. - Use
IncludeLaunchDescriptionto includeturtlebot3_world.launch.pyfrom theturtlebot3_gazebopackage (hint: usePythonLaunchDescriptionSourcetogether withget_package_share_directory).
Hint: Have a look at the ROS 2 launch file documentation, especially the IncludeLaunchDescription action.
Ordinary Wizarding Level
7 questions · 5 pts first try · 2 pts on a later try · +15 bonus for a clean sweep
Question 1 of 7
In ROS 1 every node registered with roscore. How do ROS 2 nodes find each other?